How to… Deduplicate
Understanding the level of granularity in your data is key to preparing it well for analysis. When investigating what granularity the data is recorded at, you might find some unclear answers. The cause of this lack of clarity is often duplication. This post will go through how to recognise duplicates in your data set and what you may want to do about them.
How to identify duplicates?
Unless you are intentionally looking for duplicates, you are relying on someone 'knowing the numbers' to inform you that there is something wrong. Therefore, it is important that you actively look for duplicates and the causes of them to ensure they don't exist within the data set or that you prepare the data to remove them if required. Removing duplicates assists with making the data set easier to use for analysis as by removing the duplicates mean any aggregations become easier.
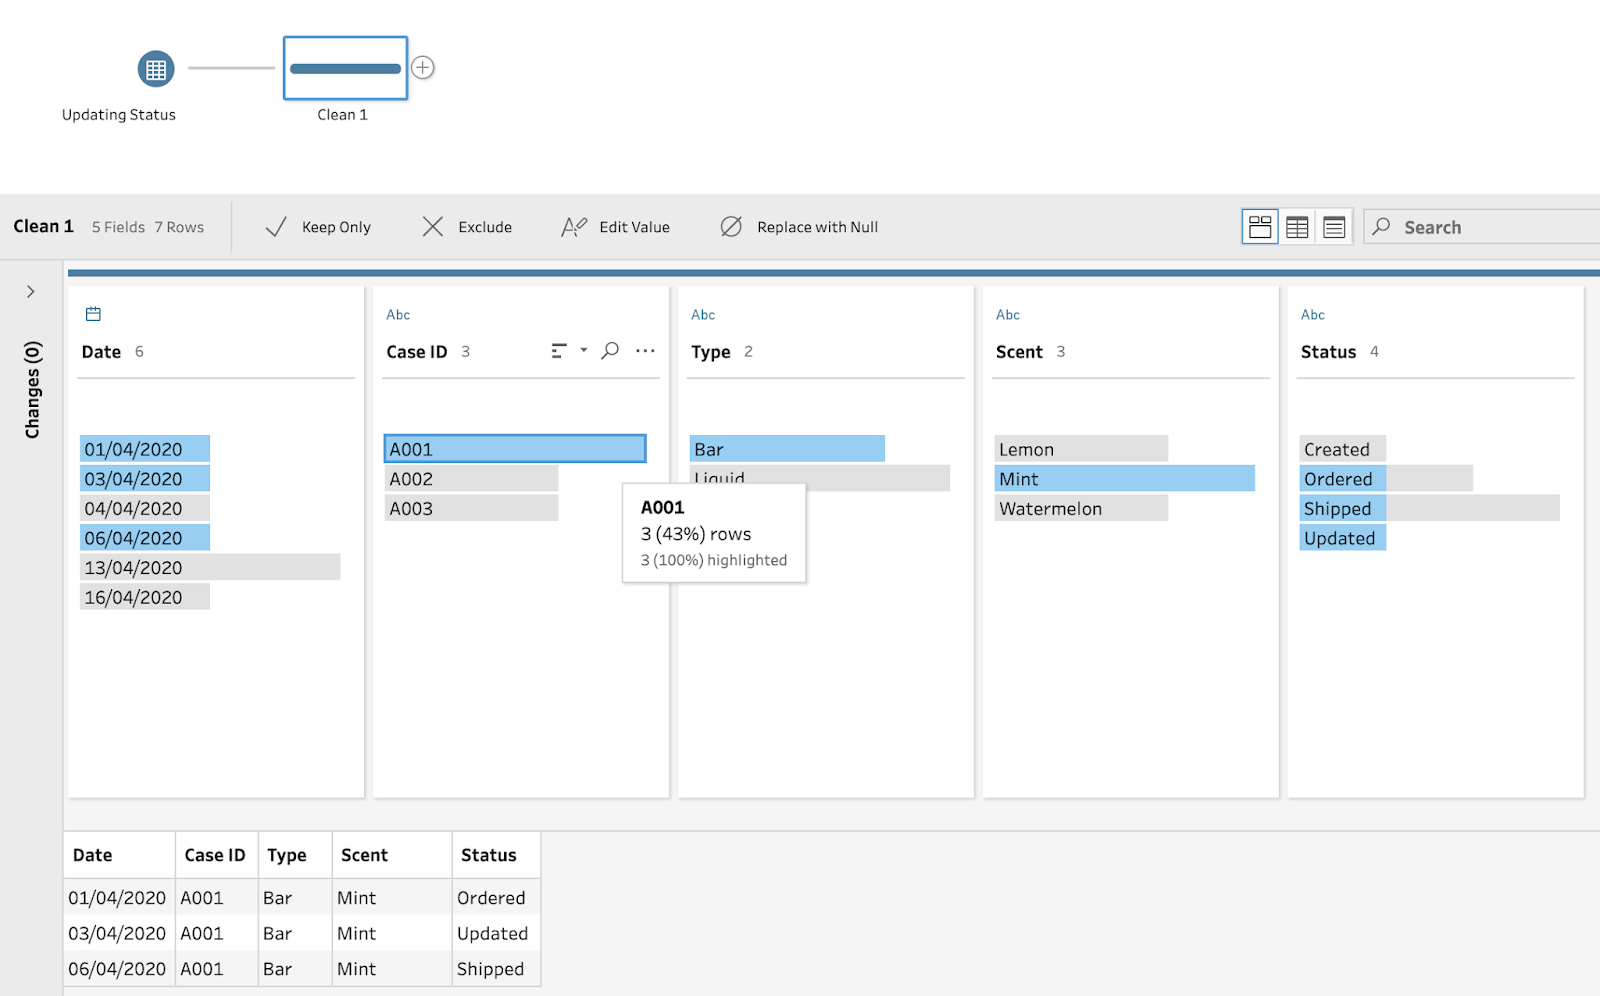
Let's look at an example where a system captures when orders come into our soap company. When analysing orders, we'd expect to have a data set where each order has its own row. When loading a data set into Prep, it is very easy to determine:
How many rows there are for each order (here represented as Case ID)?
Are there an even distribution of rows as shown in the Profile Pane?
By clicking on a single Case ID, it is easy to see in the Data Pane there are multiple rows per ID and different IDs have a different number of rows present in the data set. Now that you know there is duplication, it's time to understand the causes of duplication.
Identify the causes of duplicates
There can be many causes of duplication but let's look at a few of the more common you are likely to come across:
System Loads
As operational systems capture statuses of orders, complaints or production of items, the operational progress will be captured at different points. Each of these individual recordings may create duplicate recordings for each order, complaint or item if the previous stages are still held and not overwritten. In the example below, the status of the order is updating overtime as the company processes the order. If you were to count the orders, only a distinct count of Case ID would bring back the correct number of orders.
Row per Measure
Duplicates can also be caused where each row contains an individual measure. In the data set below, having to use distinct counts on store and product would have to be used to be able to count the number of stores selling each type of product.
Joins
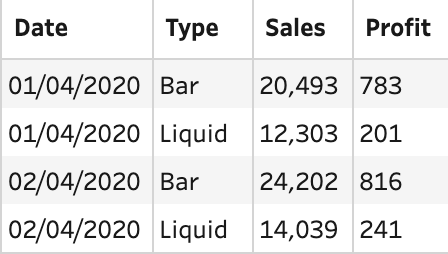
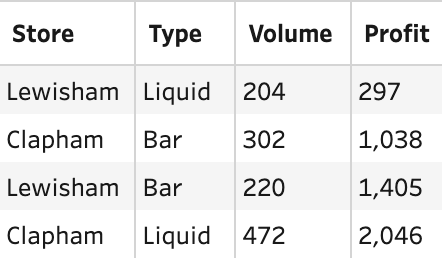
Where joins do not have a perfect one row to another row join condition, the resulting data set from the join can see multiple rows, per previous single row, created. If the following tables of data were to be joined to allow the user to analyse sales and profits at the same time, then there is no perfect way to join these two data sets that would result in only fours rows of data.
Sales Table
Profit Table
If Date and Type were matched as join conditions, then the resulting table would be 12 rows long. This means the Sales value would be repeated multiple times. If the resulting Sales column were to be simply summed up, the profit would be overstated by threefold.
What to do about duplicates in Prep?
Once you have recognised there are duplicates in your data set as well as understood the likely causes of the duplication then Prep can be used to unpick the duplicates, leaving just the records you want to provide for your analysis.
There are two principle techniques that will help prepare the data set for analysis. Choosing which one to pursue is likely to be based on the cause of the duplication:
Aggregation - Technique 1
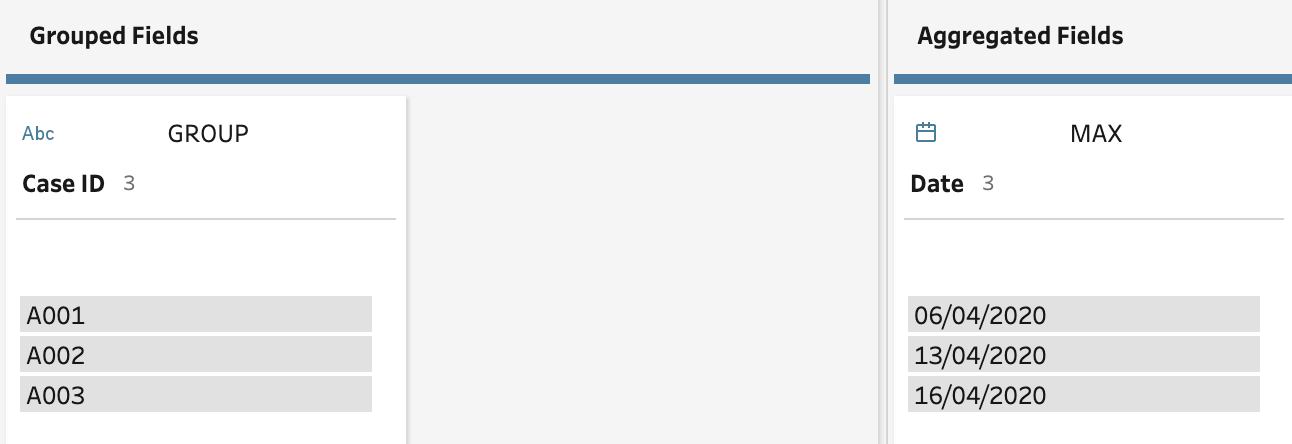
Let's use the System Load data set to show how to remove the aggregation from this data set if we wanted the latest status per case. To remove the duplication, the latest date per case needs to be retained. To do this, use an aggregation step, grouping by Case ID and return just the maximum date.
This step results in just three rows of data, one per case. The challenge with this step is an aggregate step in Prep removes all columns that are not either used as a Group By or Aggregated Field. To add the status to the latest Case ID row (and any other columns you wish to add back in), add a Join step and set the join conditions on Case ID = CaseID and Date = Date for an Inner Join.
Here is the resulting flow:
This results in a deduplicated data set with all the data fields you need for your analysis after you remove the duplicated Case ID and Date field from one side of your join.
Aggregation - Technique 2
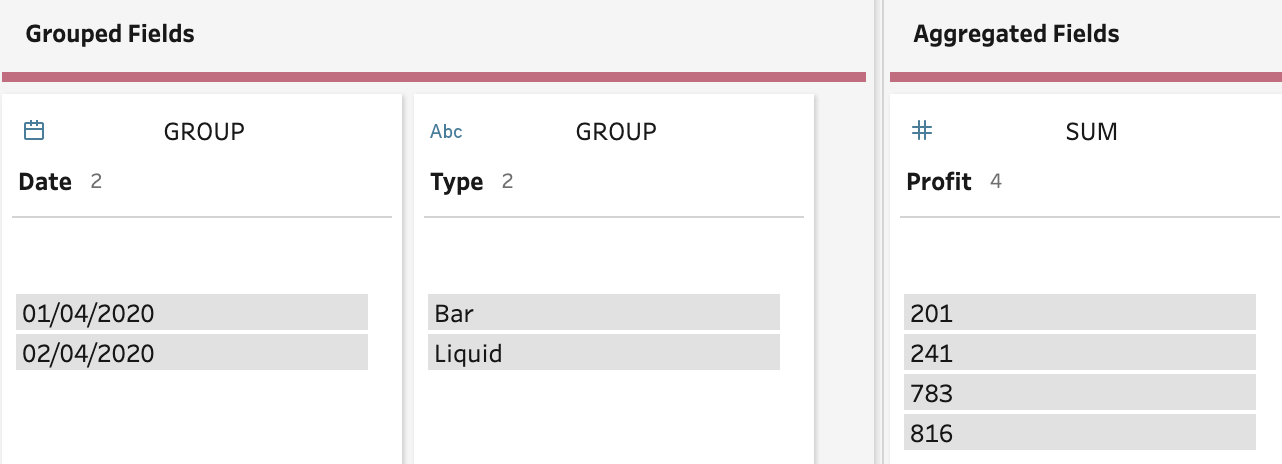
The other way an Aggregation step can be used to remove the duplicates in your data set is to help in the Join scenario mentioned above. The Aggregation step is use before the Join step to form the same level of granularity in both data sets. Using the same data set from the Join example, there is the need to aggregate the Profit table data set to a single row per each combination of Product Type and Date. The Aggregation step can be set-up like the image below to complete this task.
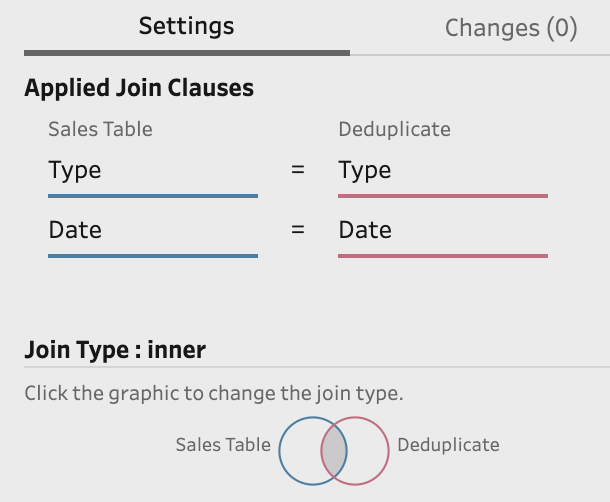
As the requirement for this join is to add the Profit column on to the Sales table, you don't need to add the Store Name back in using a Join like in the Technique 1. Here is how the Join step is set-up:
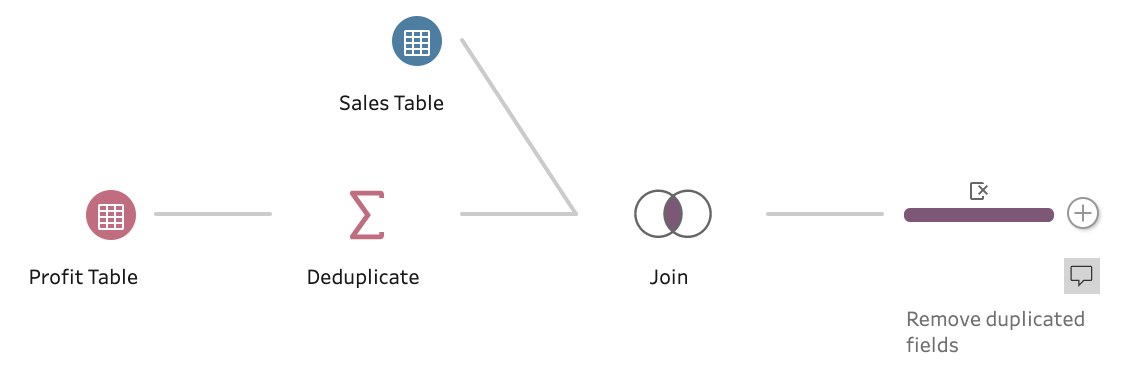
The overall flow to solve the duplication is this after the removal of duplicated fields (Type and Date) because they are in both data sets going into the Join:
The resulting data sets look like:
Pivot - Rows to Columns
If you have multiple rows that contain duplicates that are caused by different measures, you can use a Pivot step to turn each of the rows containing a different measure to be a column instead. The Pivot step can be set up as per the below image using the Measure per Row data set:
There is no need to add any categorical / dimensional data back into the data set using a Join step as anything that is not used in the Rows to Columns pivot remains in the data set. The flow is simple:
The resulting data set is as follows:
Summary
Removing duplicates from data that you wish to analyse can save you from some challenging calculations and potentially save you from some mistakes. Depending on how the duplication has occurred will alter how to approach the removal. As always, planning your preparation and being clear on what you will require for the output is key on making the correct steps.

