
How to… Change your Headers in Prep
With Prep Builder 2024.1, a new option became available when using the Input step that many users have been waiting for — changing your data set’s row that is used for forming the headers of the data fields.
The challenge
The world still seems to run on spreadsheets and csv files. Yes, large data sets and databases keep getting larger and larger but most individuals I see interacting with data do so through a spreadsheet application or simplified extract of those large data sets. There is nothing wrong with this. It’s not an easy way to work with data but until we have better data education through our academic system then things won’t change. The outcome of this is many of those simple files become data sources that need to be used in analytical work. These files are often manipulated from their original outputs into something easier for humans to use. Sadly humans and computers read data sets and files very differently.
If you’ve ever worked in an organisation with others you are likely to have come across files where the data sets look this:

Yes, I might have been a little flippant with the use of the titles but I bet you’ve come across files like this. Sadly, they don’t play nicely with Tableau Prep when preparing the data set for analysis. When you load this data set as a .csv, or Excel, file you will instantly see a number of issues present themselves:

Notice on this screenshot of the Input step that the data field names start with an F. This is a sign that Prep Builder has been unable to find a suitable header for the data field. I’ve seen Really Nice Title be used with the other data fields just showing a field starting with F.
_________________________________
As a quick aside, with version 2024.1 onwards, you’ll now see Source Row Number show on the Input step as the data is now shown. Previously you would have seen the Source Row Name field struck through in the Metadata grid (now called the Field List view).
_________________________________
In versions of Prep Builder before 2024.1, with Excel you would have had the option to use the Data Interpreter function to find data tables with the worksheet. Now you have much more control on both what row will be used to form the column headers and from which row the data begins.
Setting the Header row
When inputting a .xlsx or .csv file, you’ll now find in the configuration pane of the Input step the subsection on Header Options. You can find the options at the bottom of the following image.
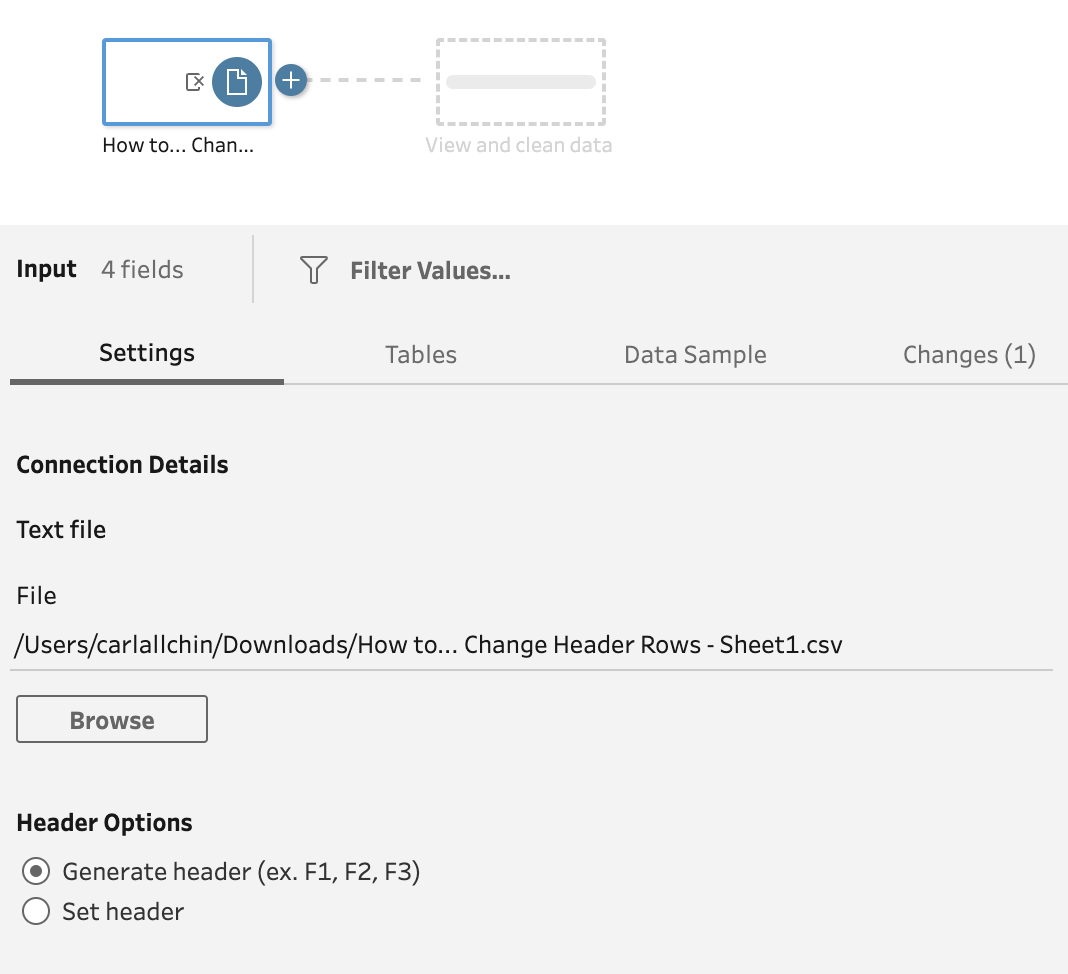
If you leave the radio button selection as Generate header (ex. F1, F2, F3) then you’ll still get the traditional default behaviour from Prep. This means if you have previous flows already tackling this problem by using some sneaky workarounds (hello Pivoting!) they will still work and you won’t need to update these flows if they are scheduled to run automatically.
If you do change the radio button selection to Set header then you will be presented with the following options:
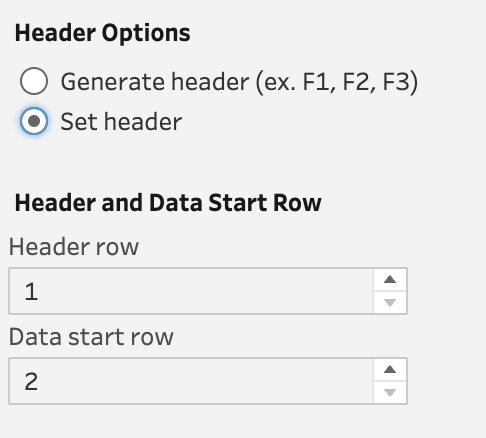
These options allow you to set what row you’d like to use for the headers of your data fields and then when you want Prep to start reading the data in from. The value used to describe the row isn’t the one found in the Source Row Number field but the number found to on the left hand of the data view of the Input step. You can see this in the second image of this blog post.
By changing the headers to start from row 4 and then data to start from row 5 you can see Prep shows what effects will happen in the Input step (without having to flip to a subsequent Clean step).

Summary
This change is unlikely to change your world but is a quality of use improvement that will save you from having to pre-format the data or conduct a horrible workaround.
The Data start row option will have many uses when you want to only pick up a subsection of a table without having to input everything to just filter out a lot of what you’ve just brought in in a subsequent step.